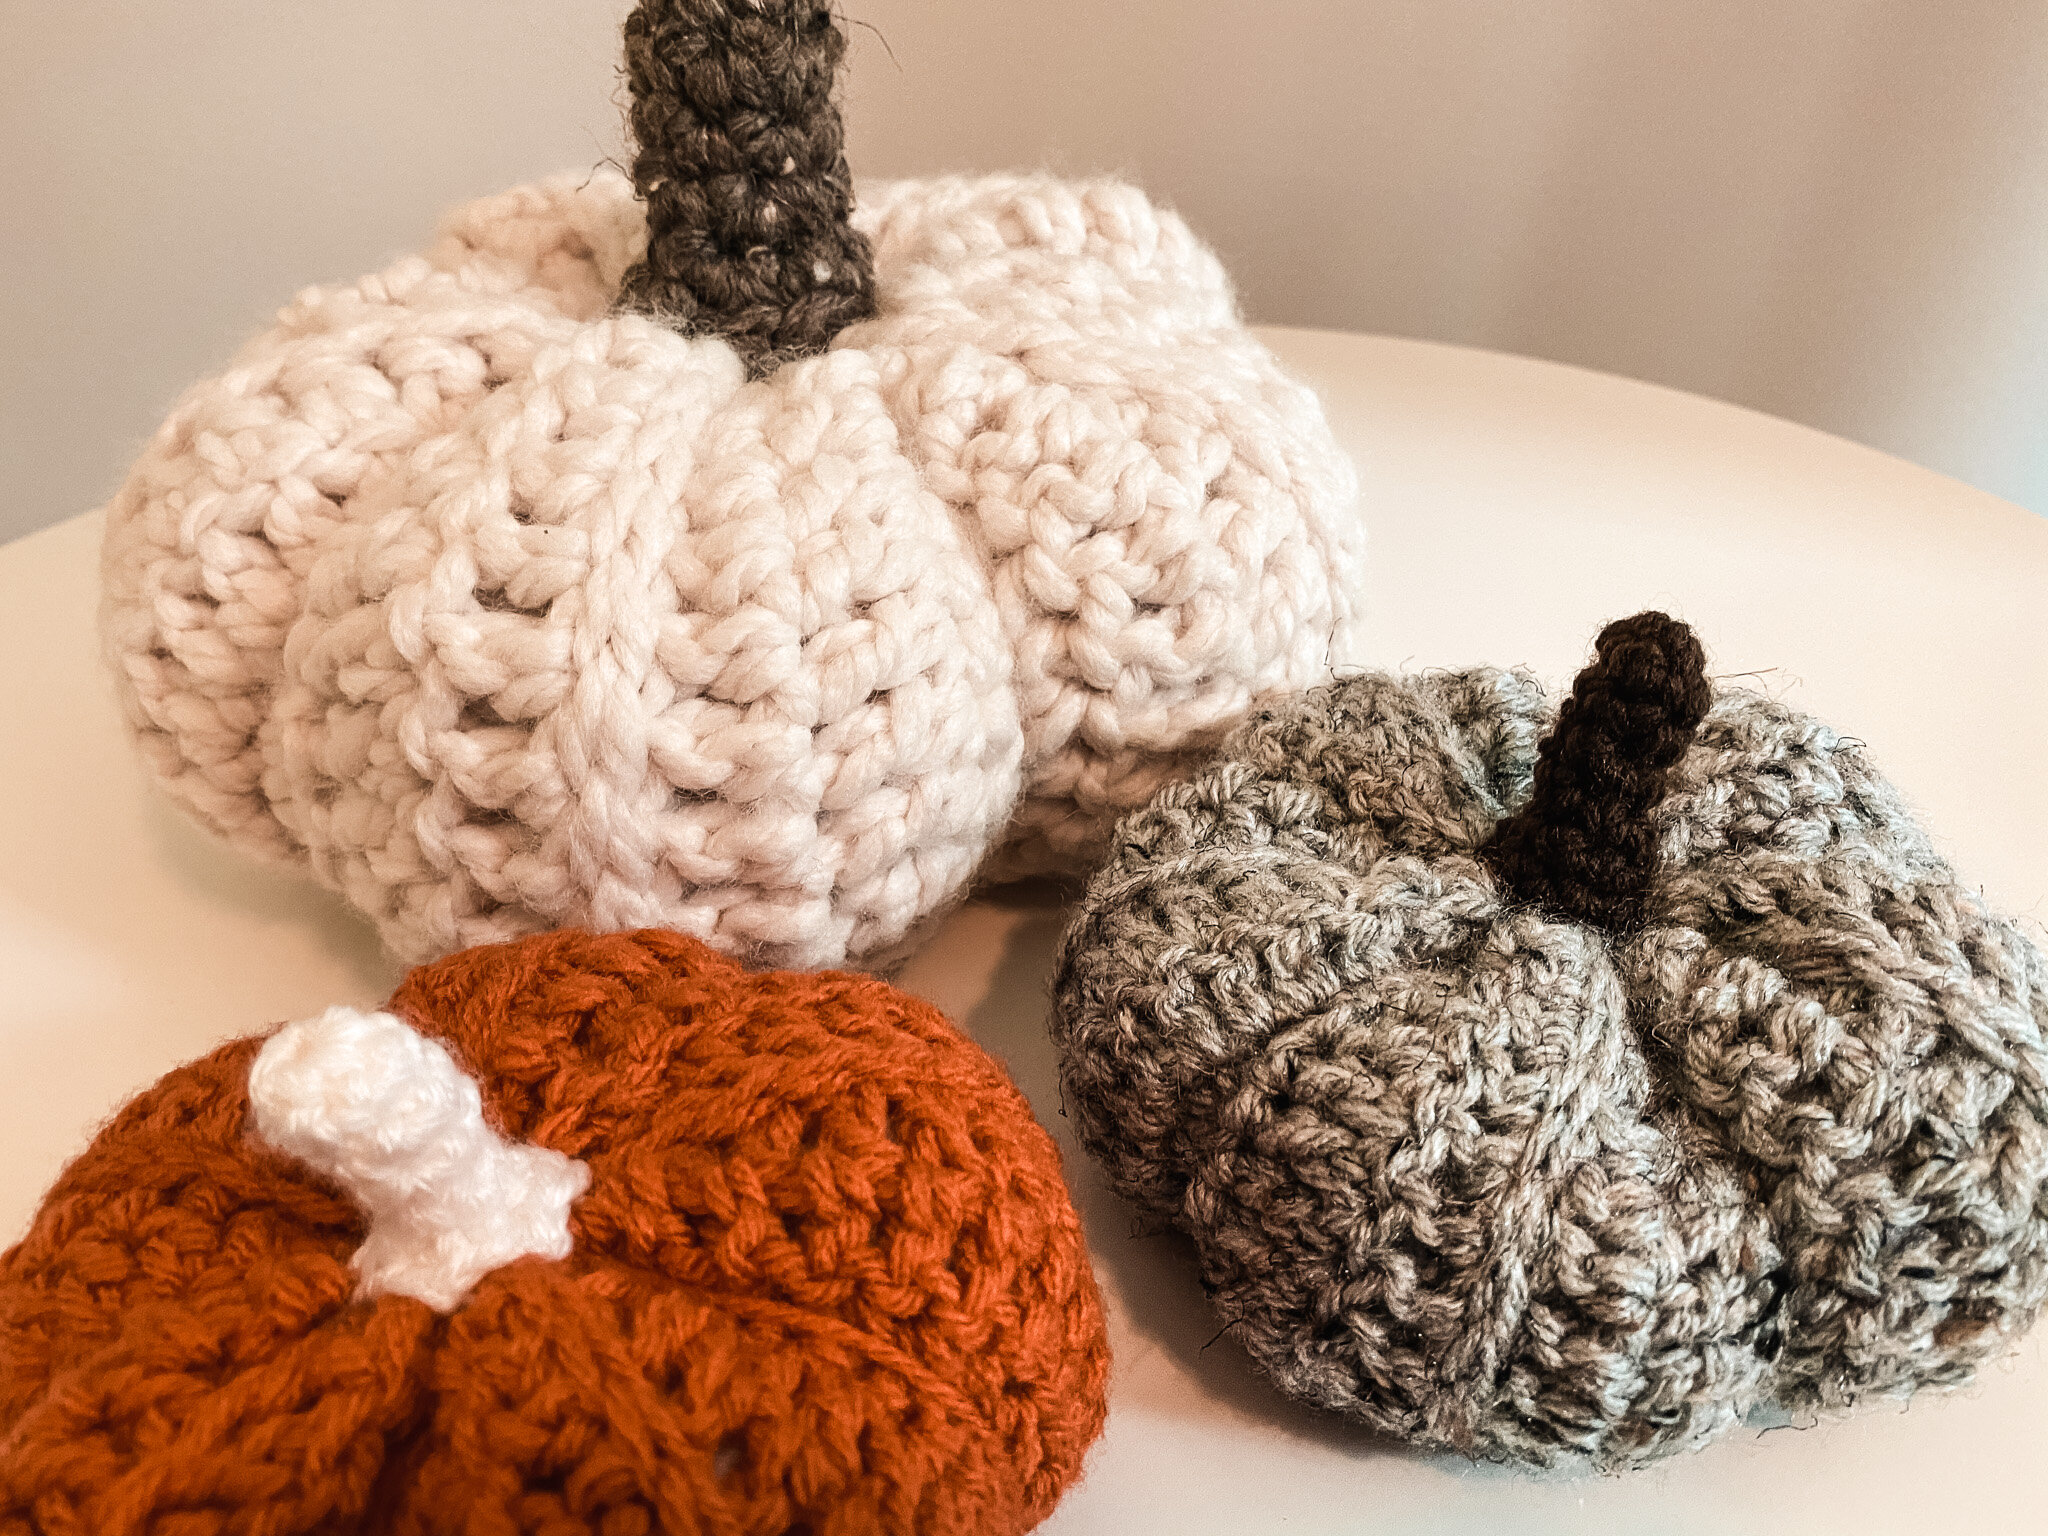
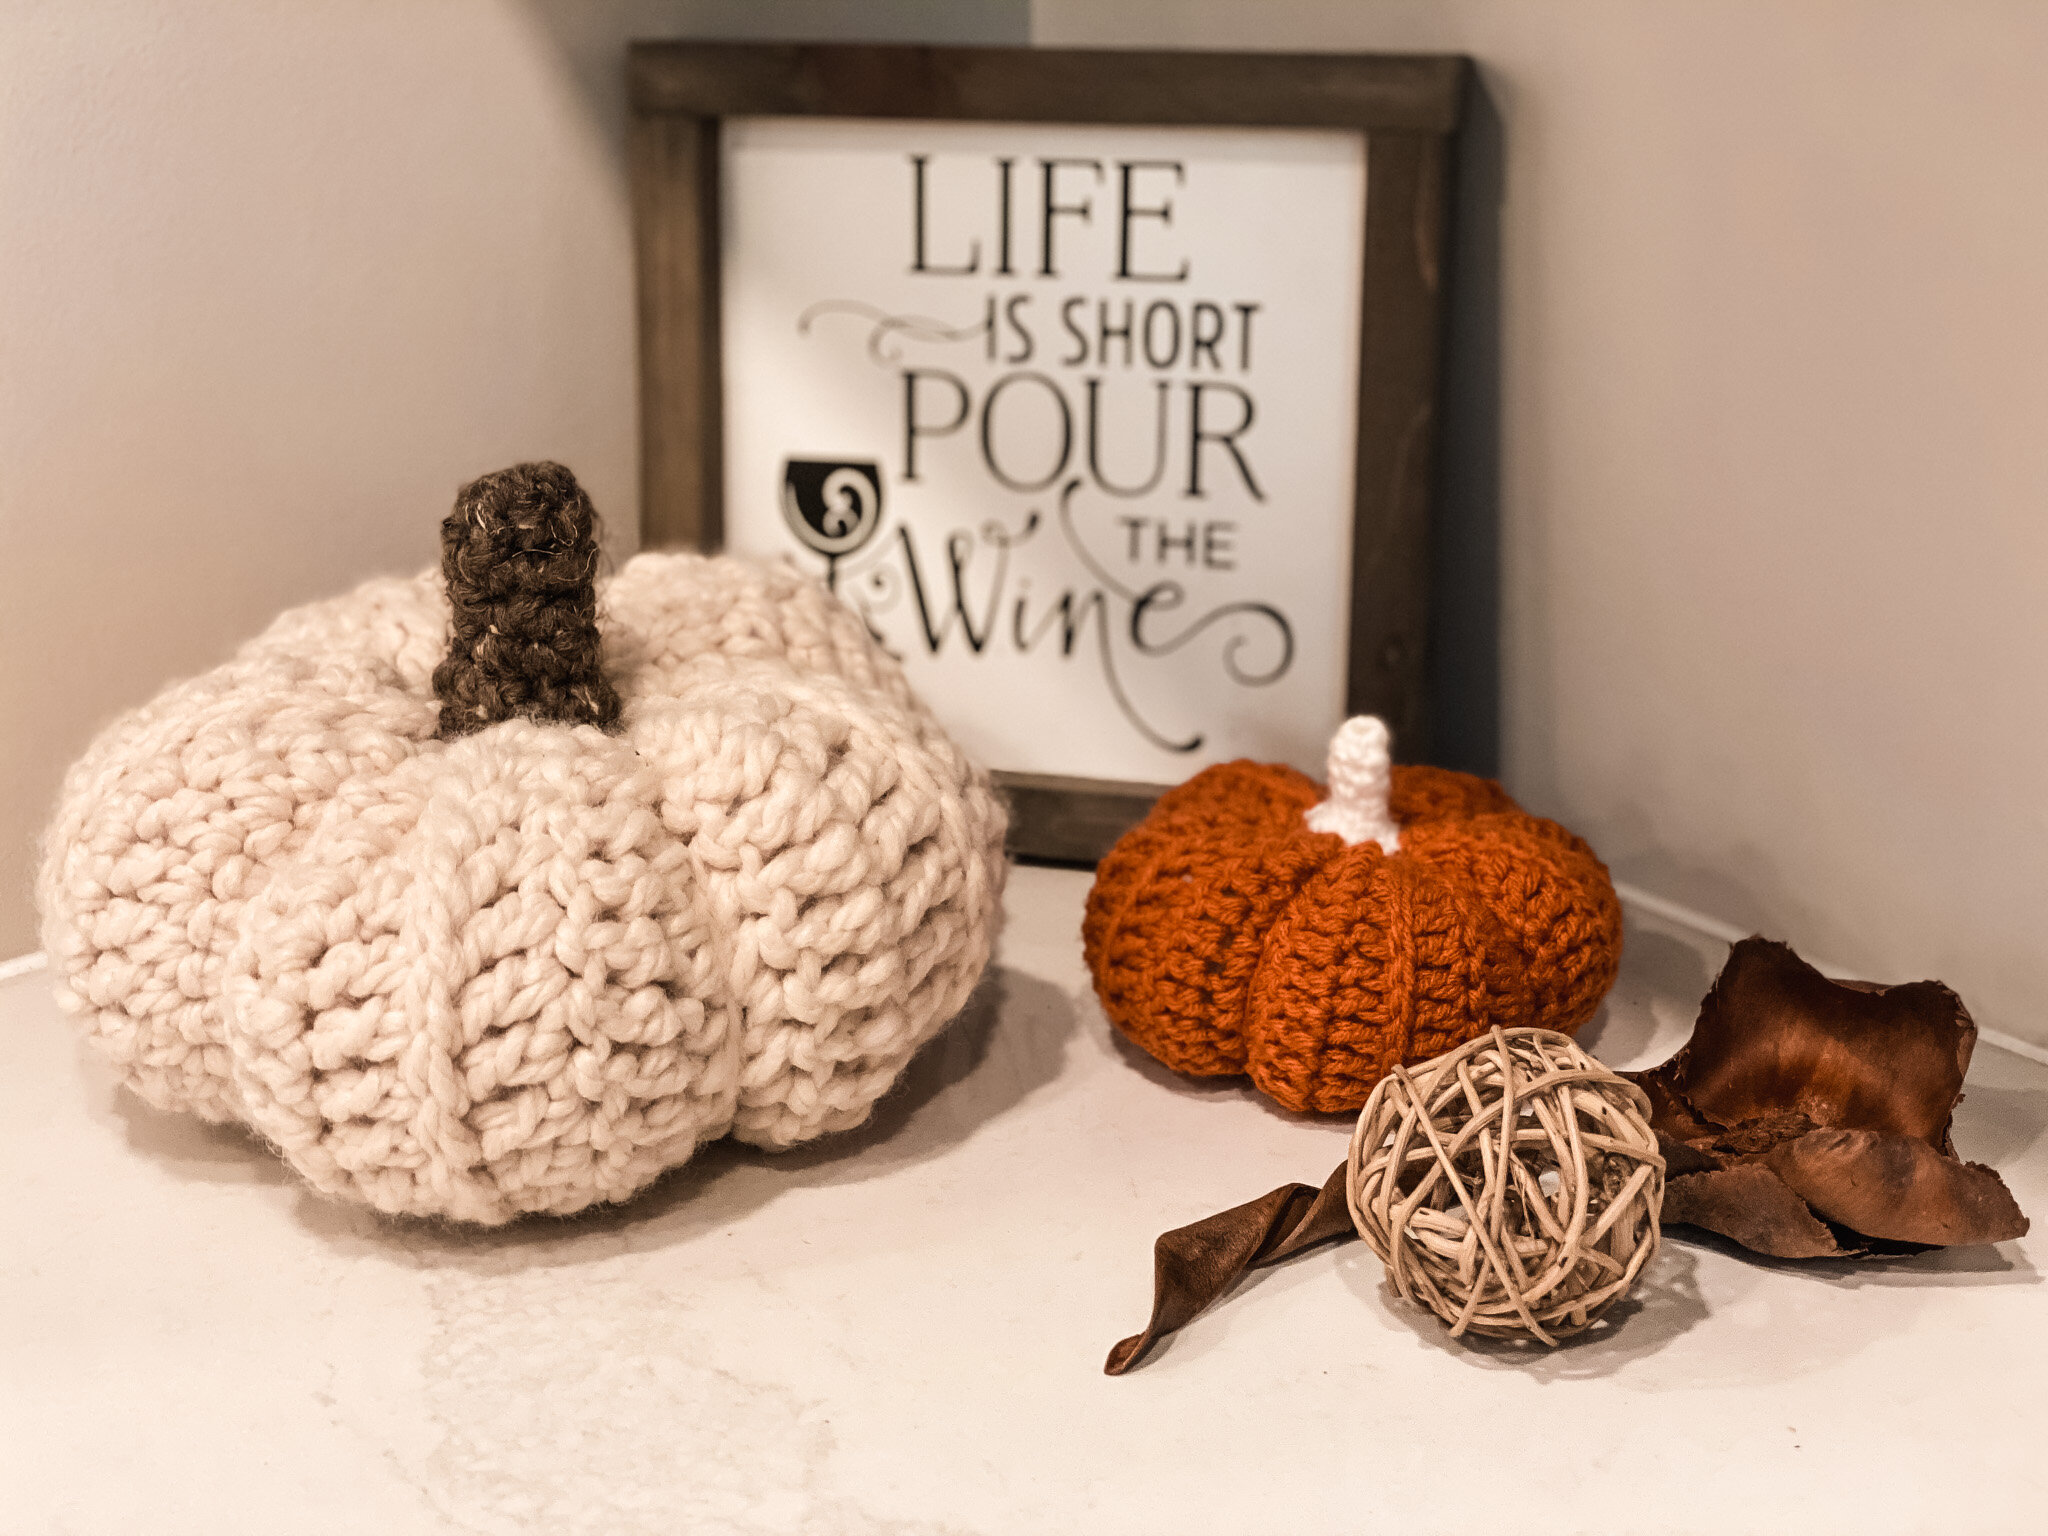
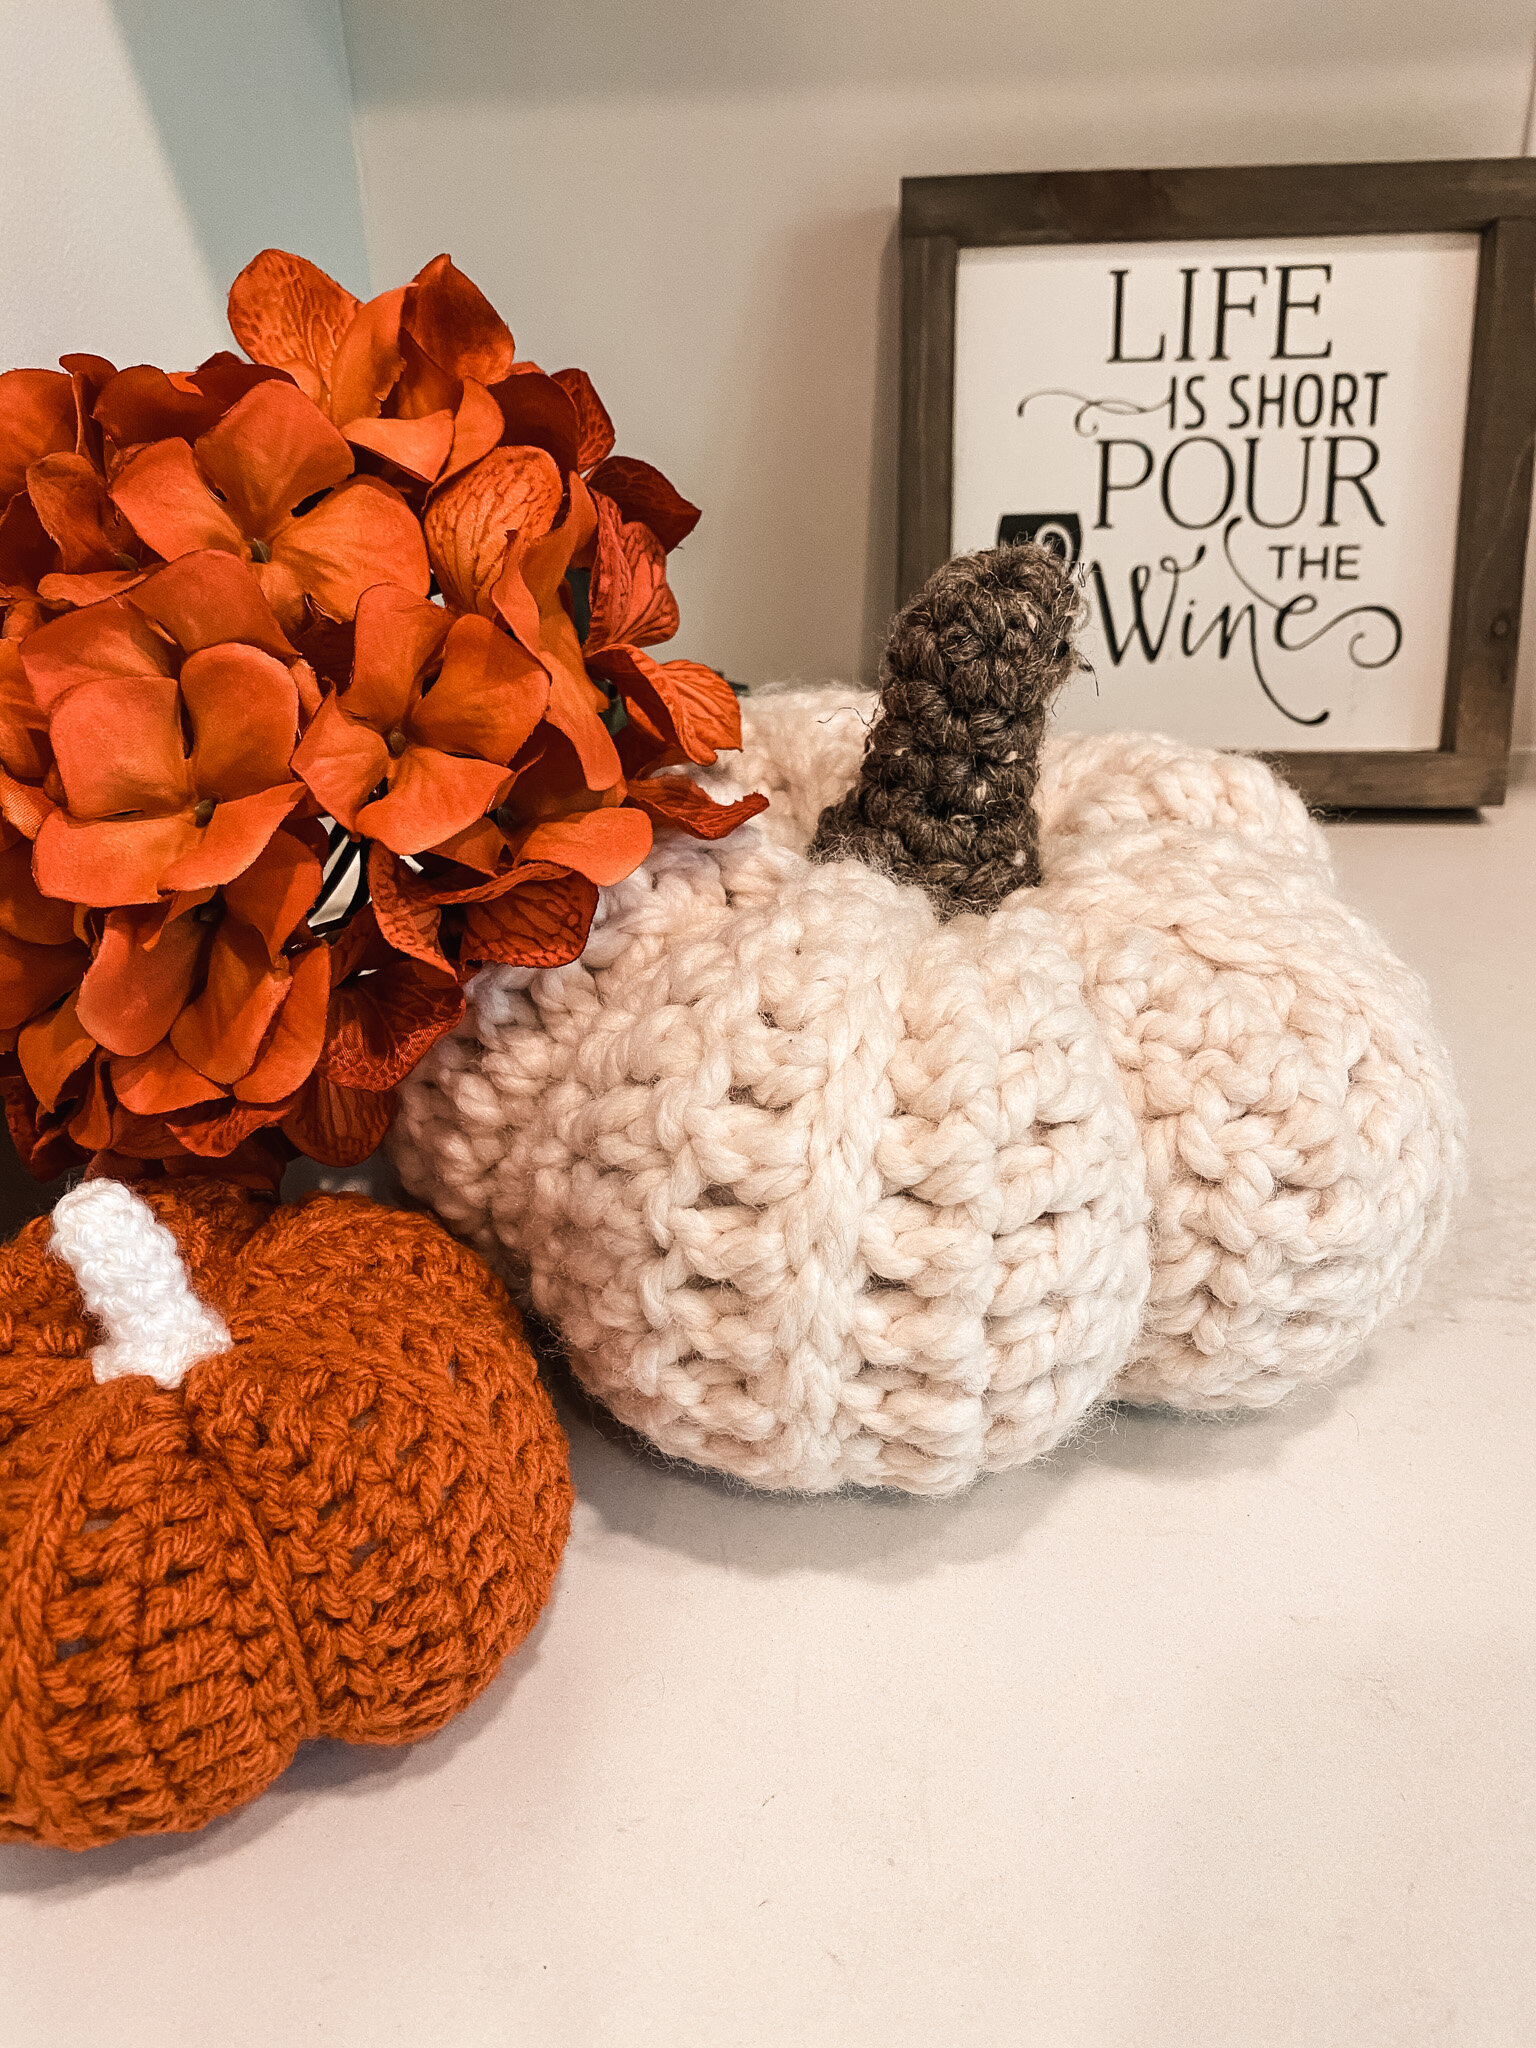
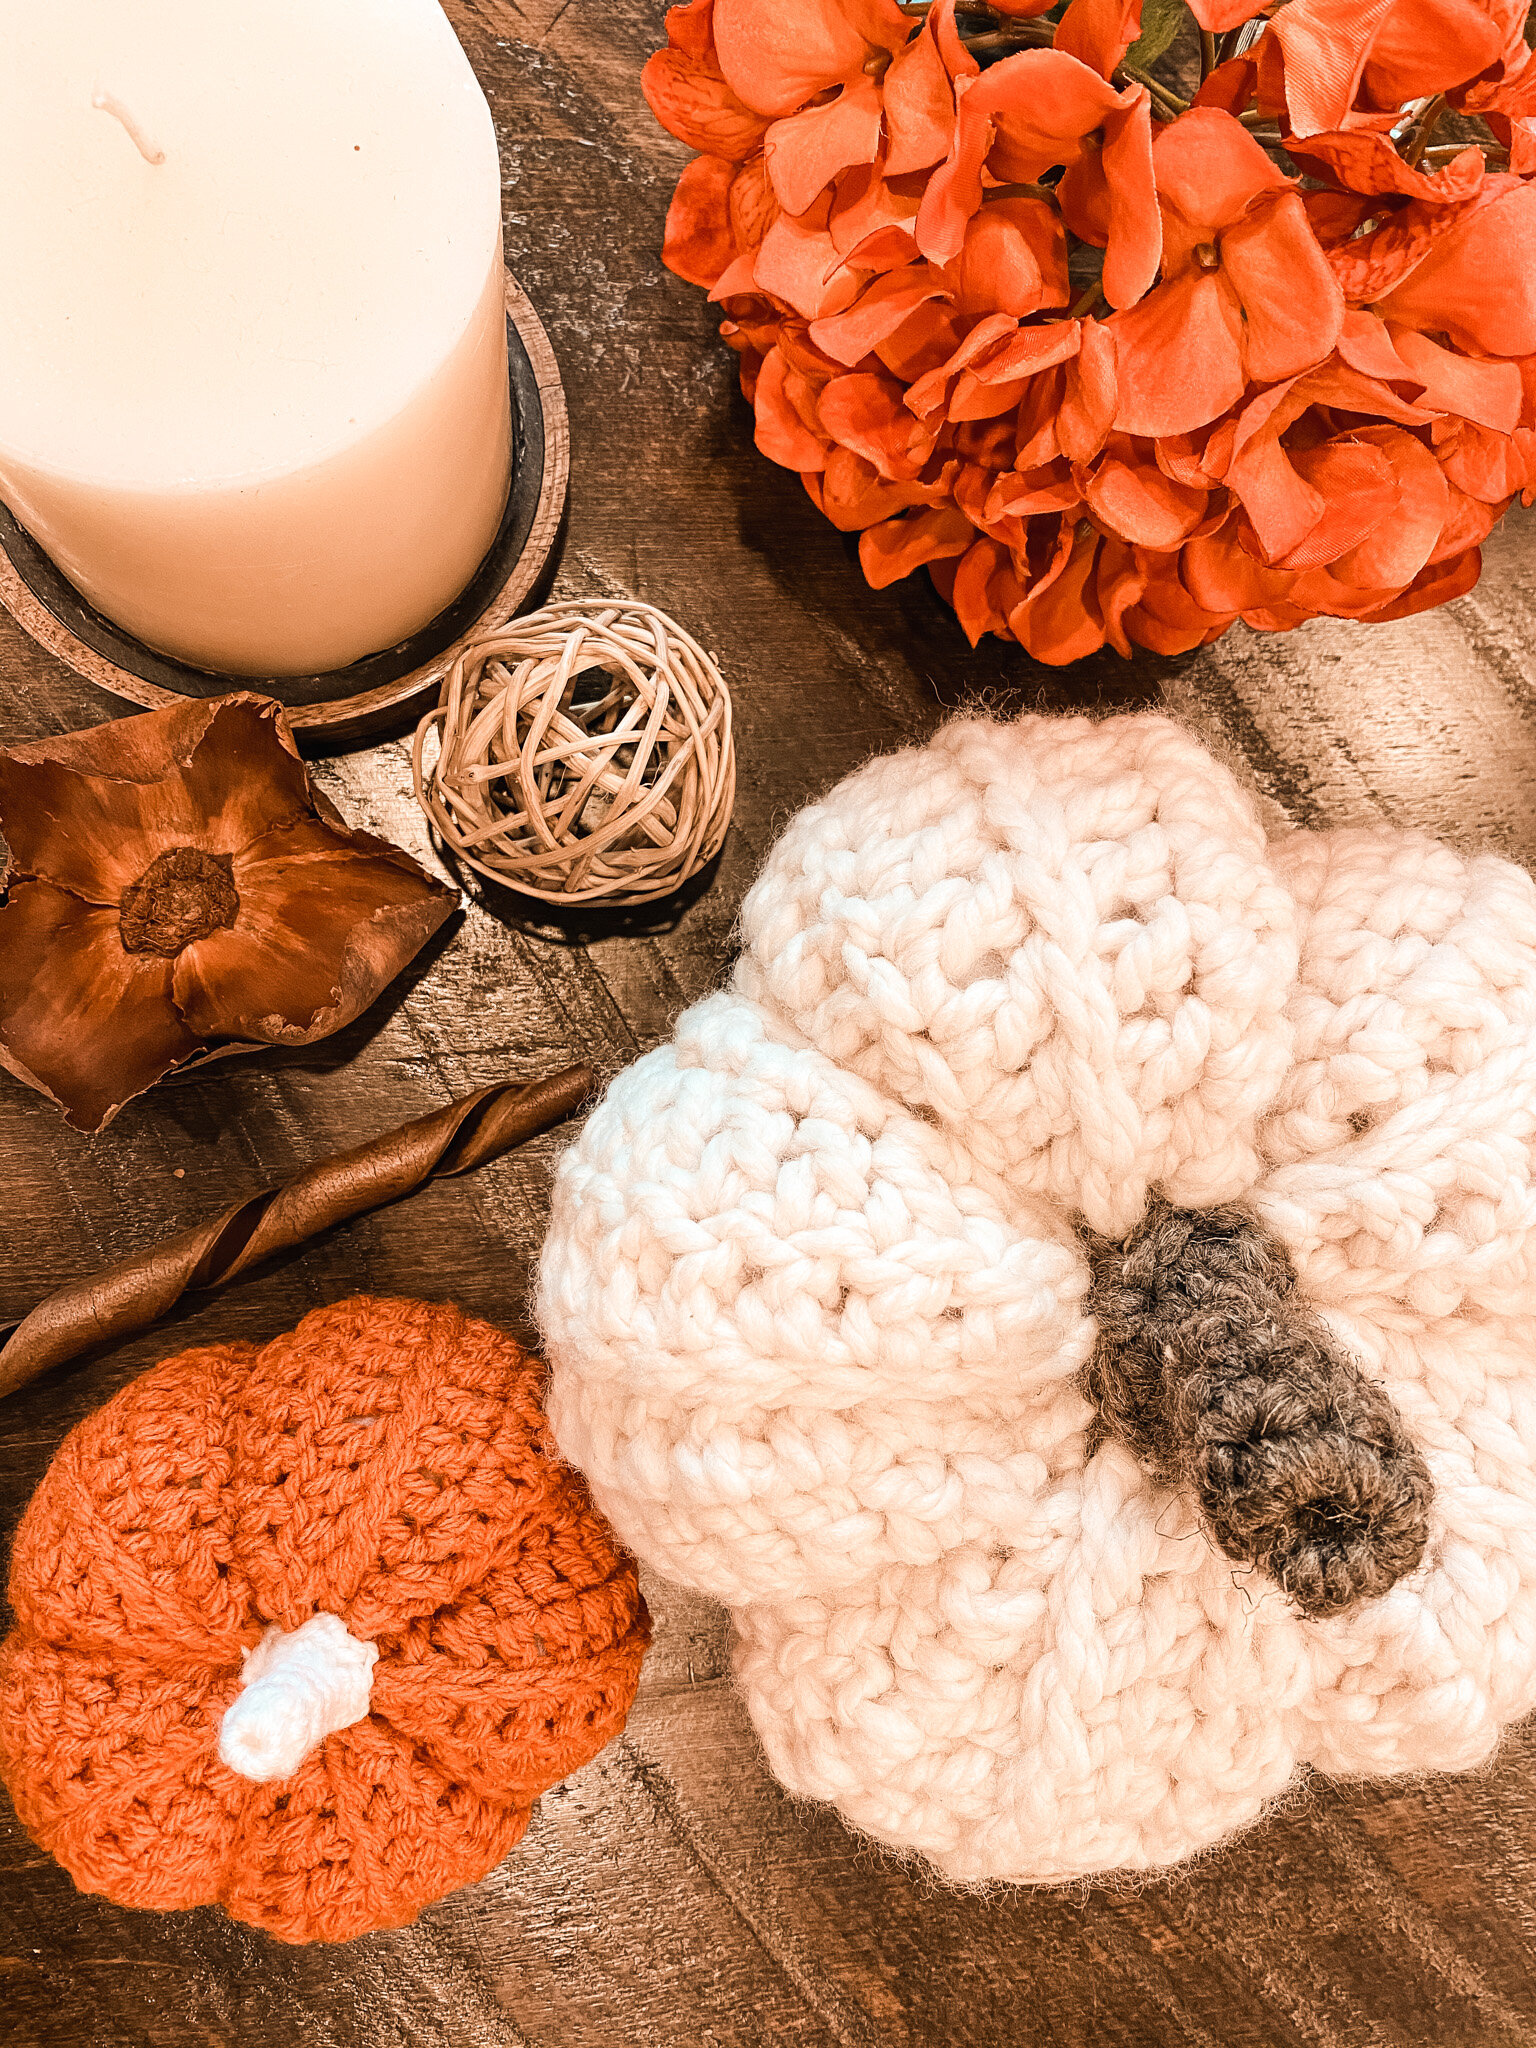
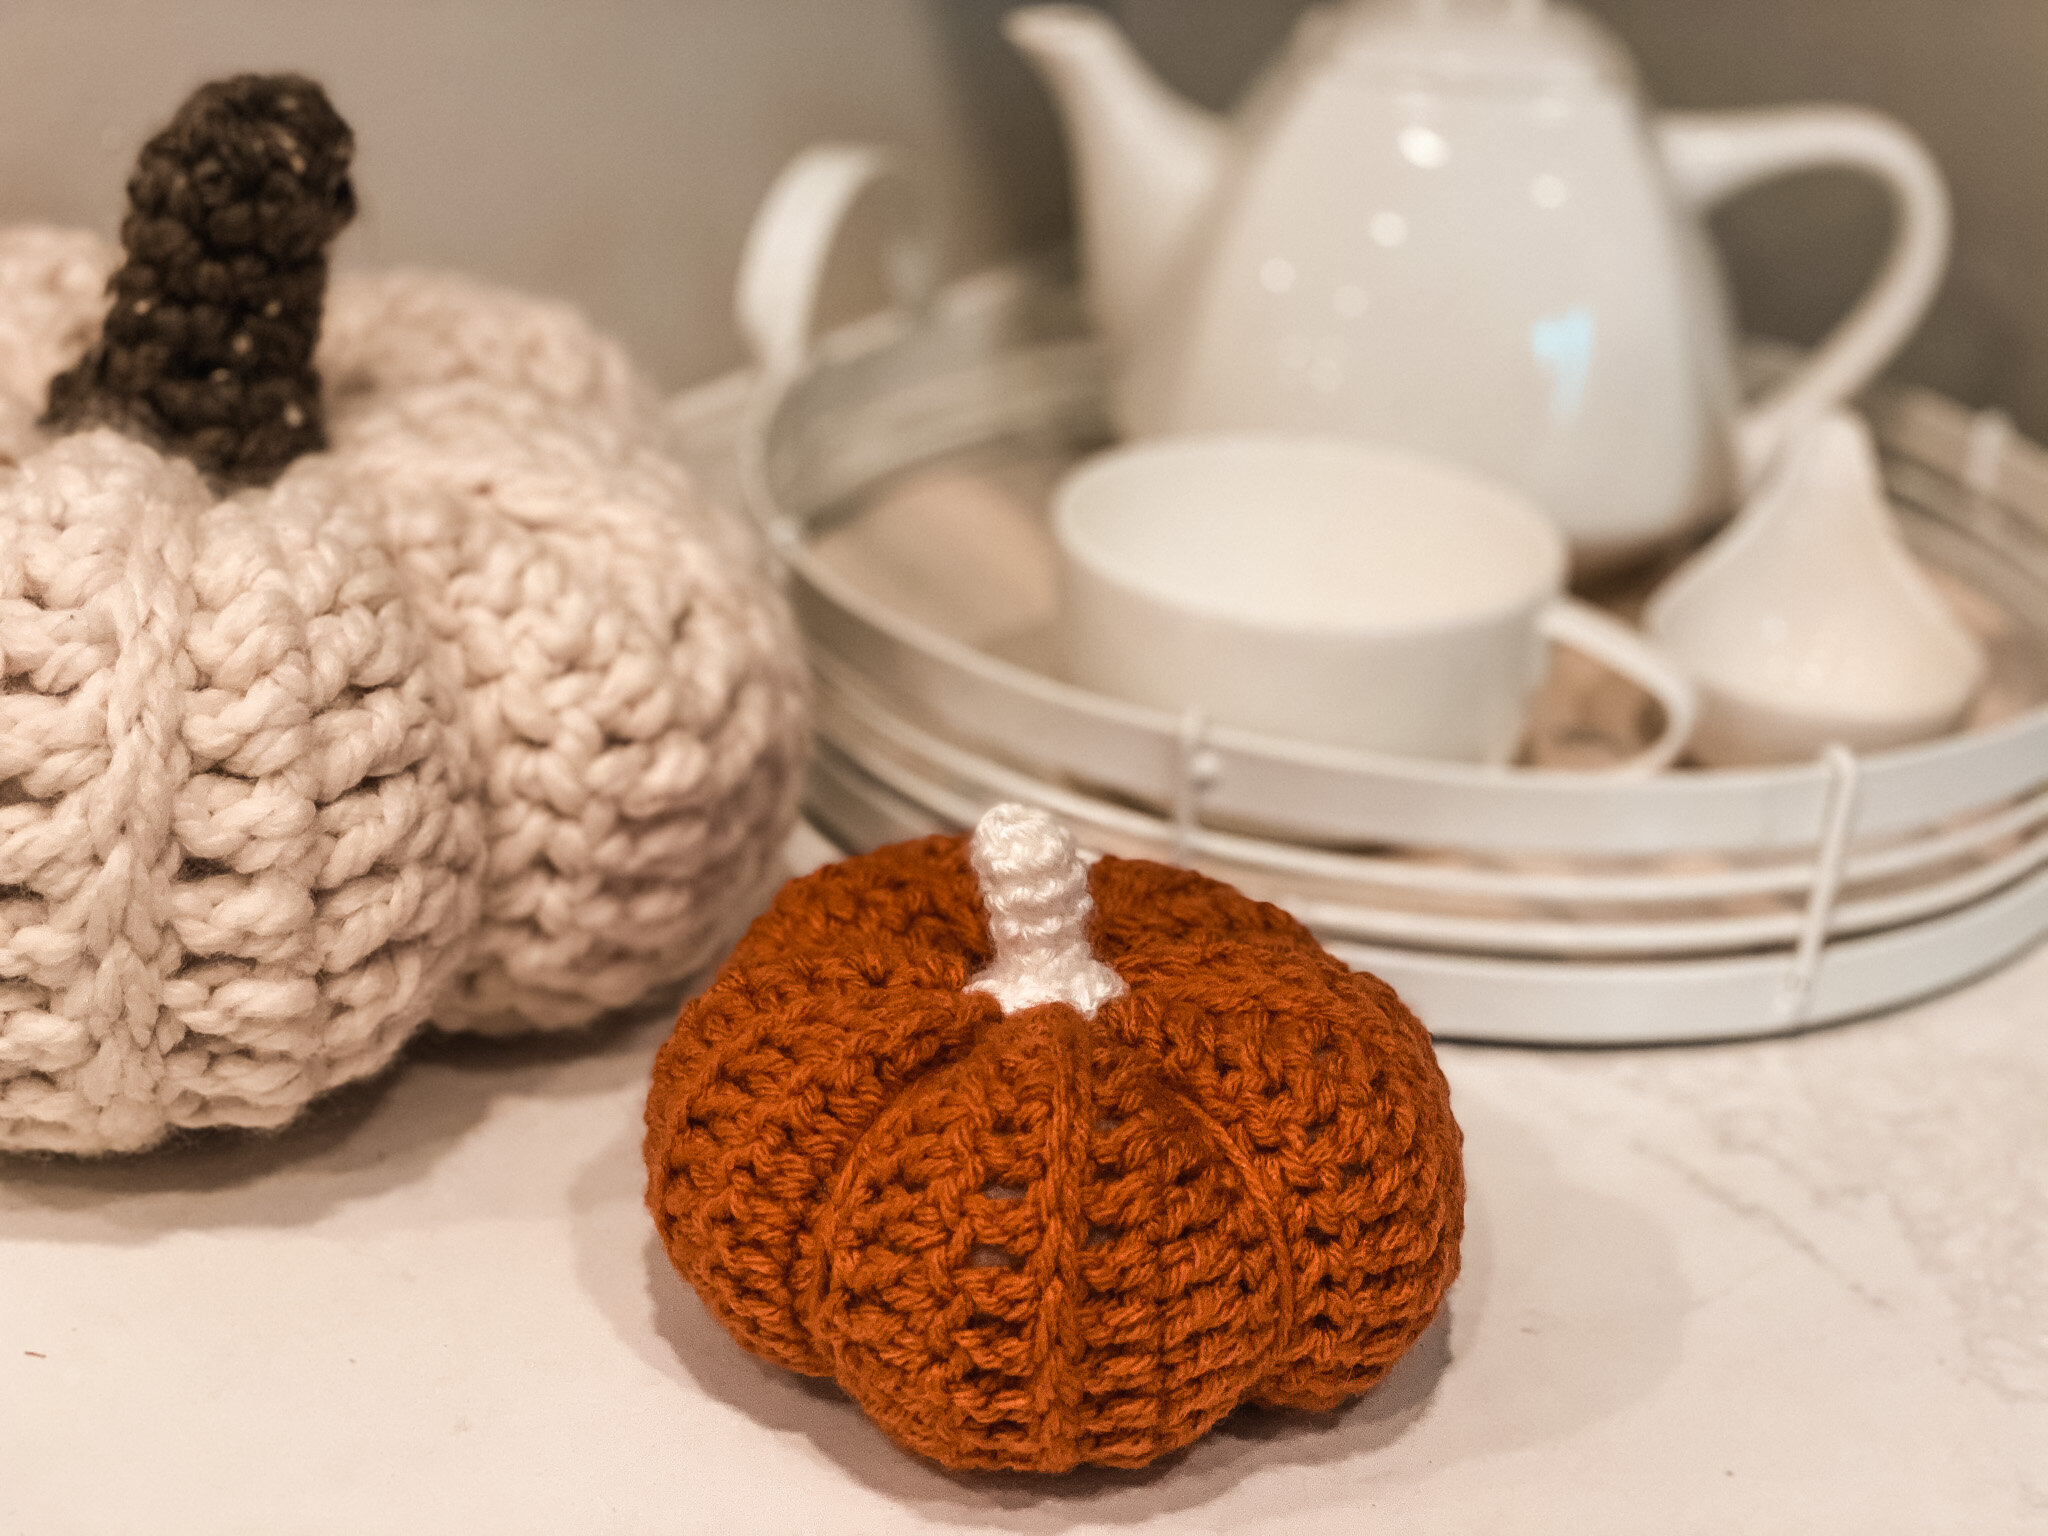
Plumpy Pumpkins Crochet Pattern

Fall is the best season for decor…
The colours, the scents, the coziness… it’s my favourite season!
Join me in celebrating by making these crochet plumpy pumpkins in whatever size and colours inspire you.
My posts may contain affiliate links that help support the content on my site at no extra cost to you, so I can keep bringing you free patterns to enjoy and share with the world. Please review my Privacy Policy for more details, including my Copyright Policy about pattern making, credit and sharing. Happy crafting!
Making time: ~1 hour
Materials needed:
Yarn of any weight, amount varies based on weight (worsted: ~50 yards, bulky ~100 yards)
My grey tweed pumpkin from the video tutorial is Worsted Weight: Vanna’s Choice Tweeds in Grey Marble, using scraps - there are a few others with the tweed that would looks great, like Oatmeal or Barley, the stump is identifiable scrap yarn in a brown colour, maybe Loops & Threads Impeccable Solids in Chocolate Brown
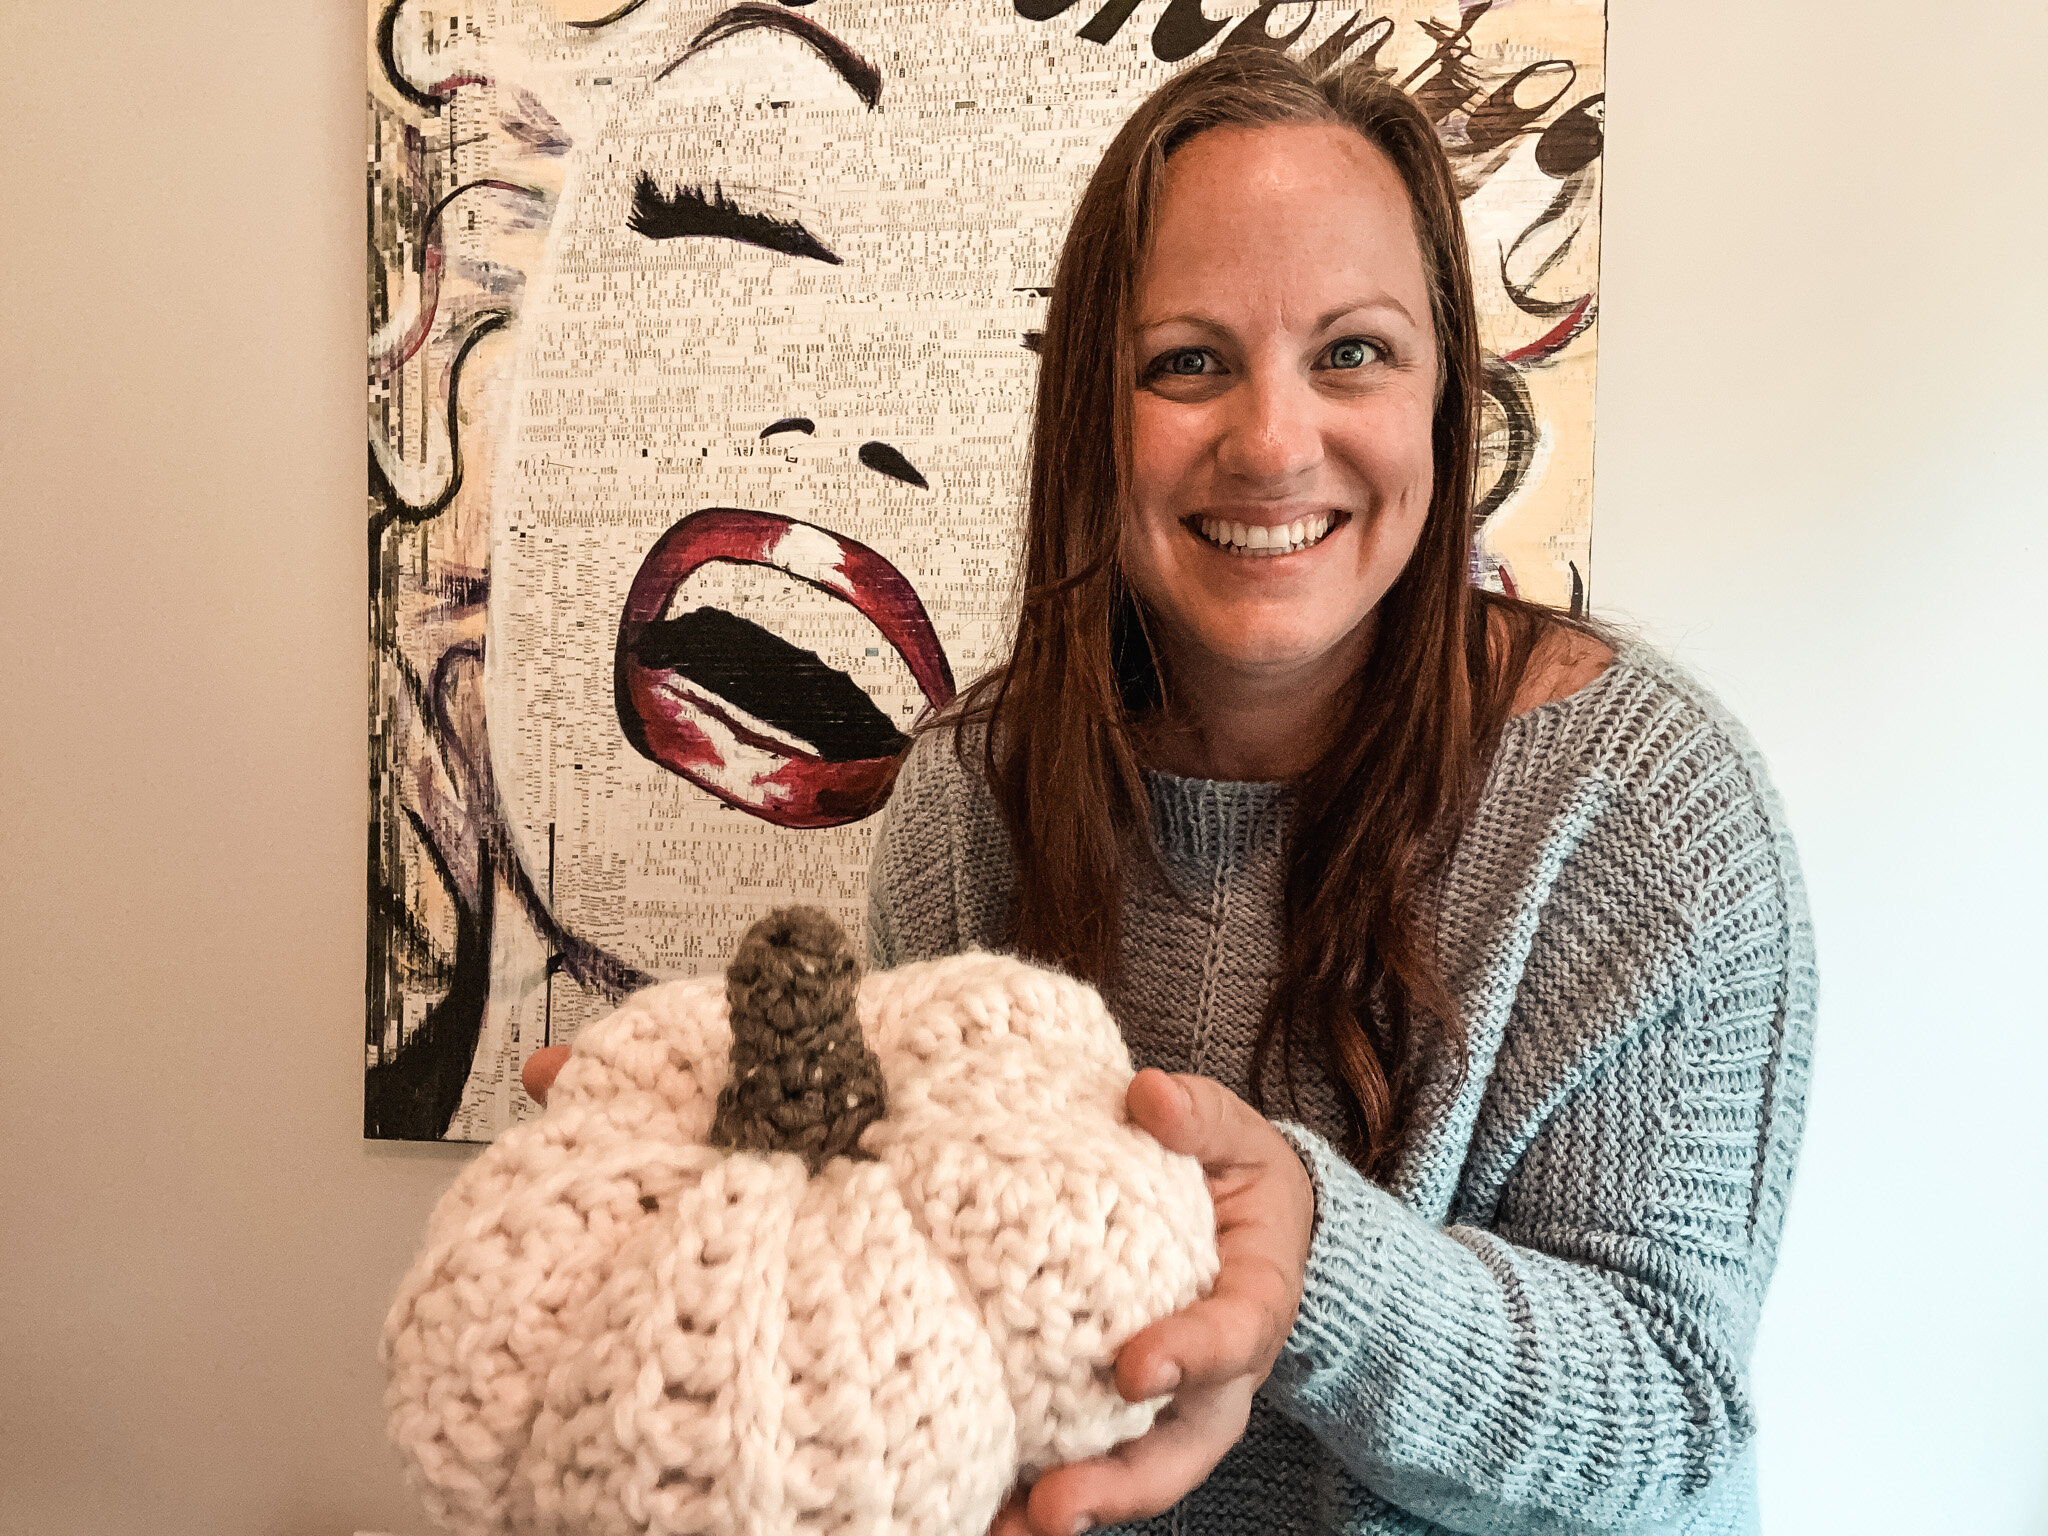
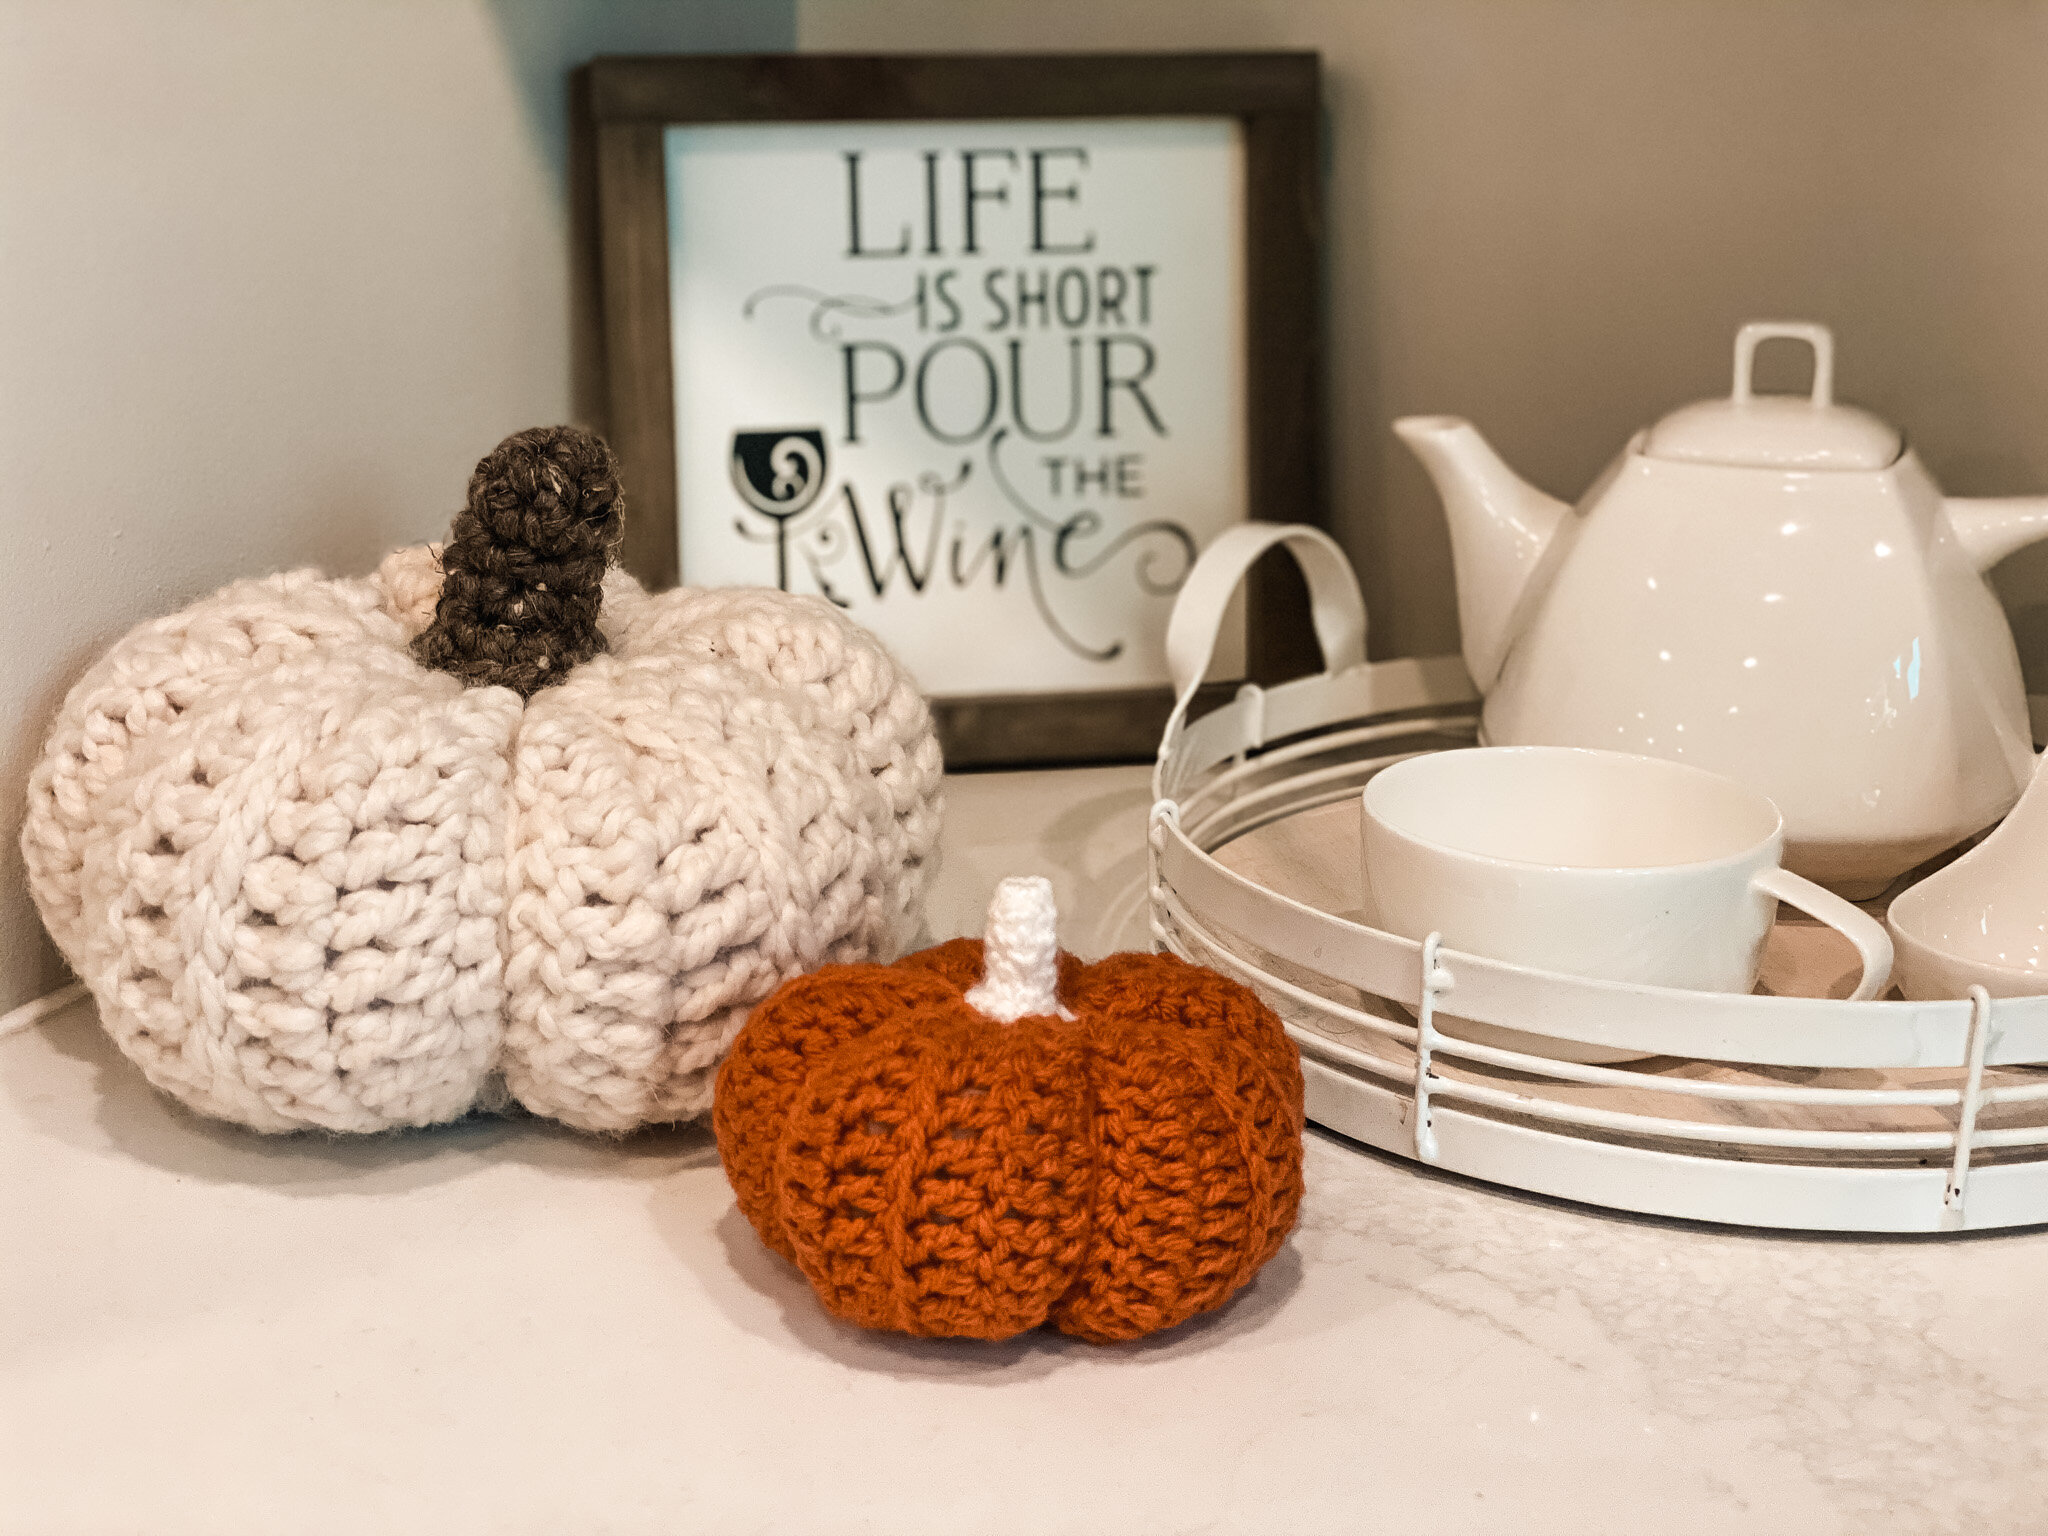
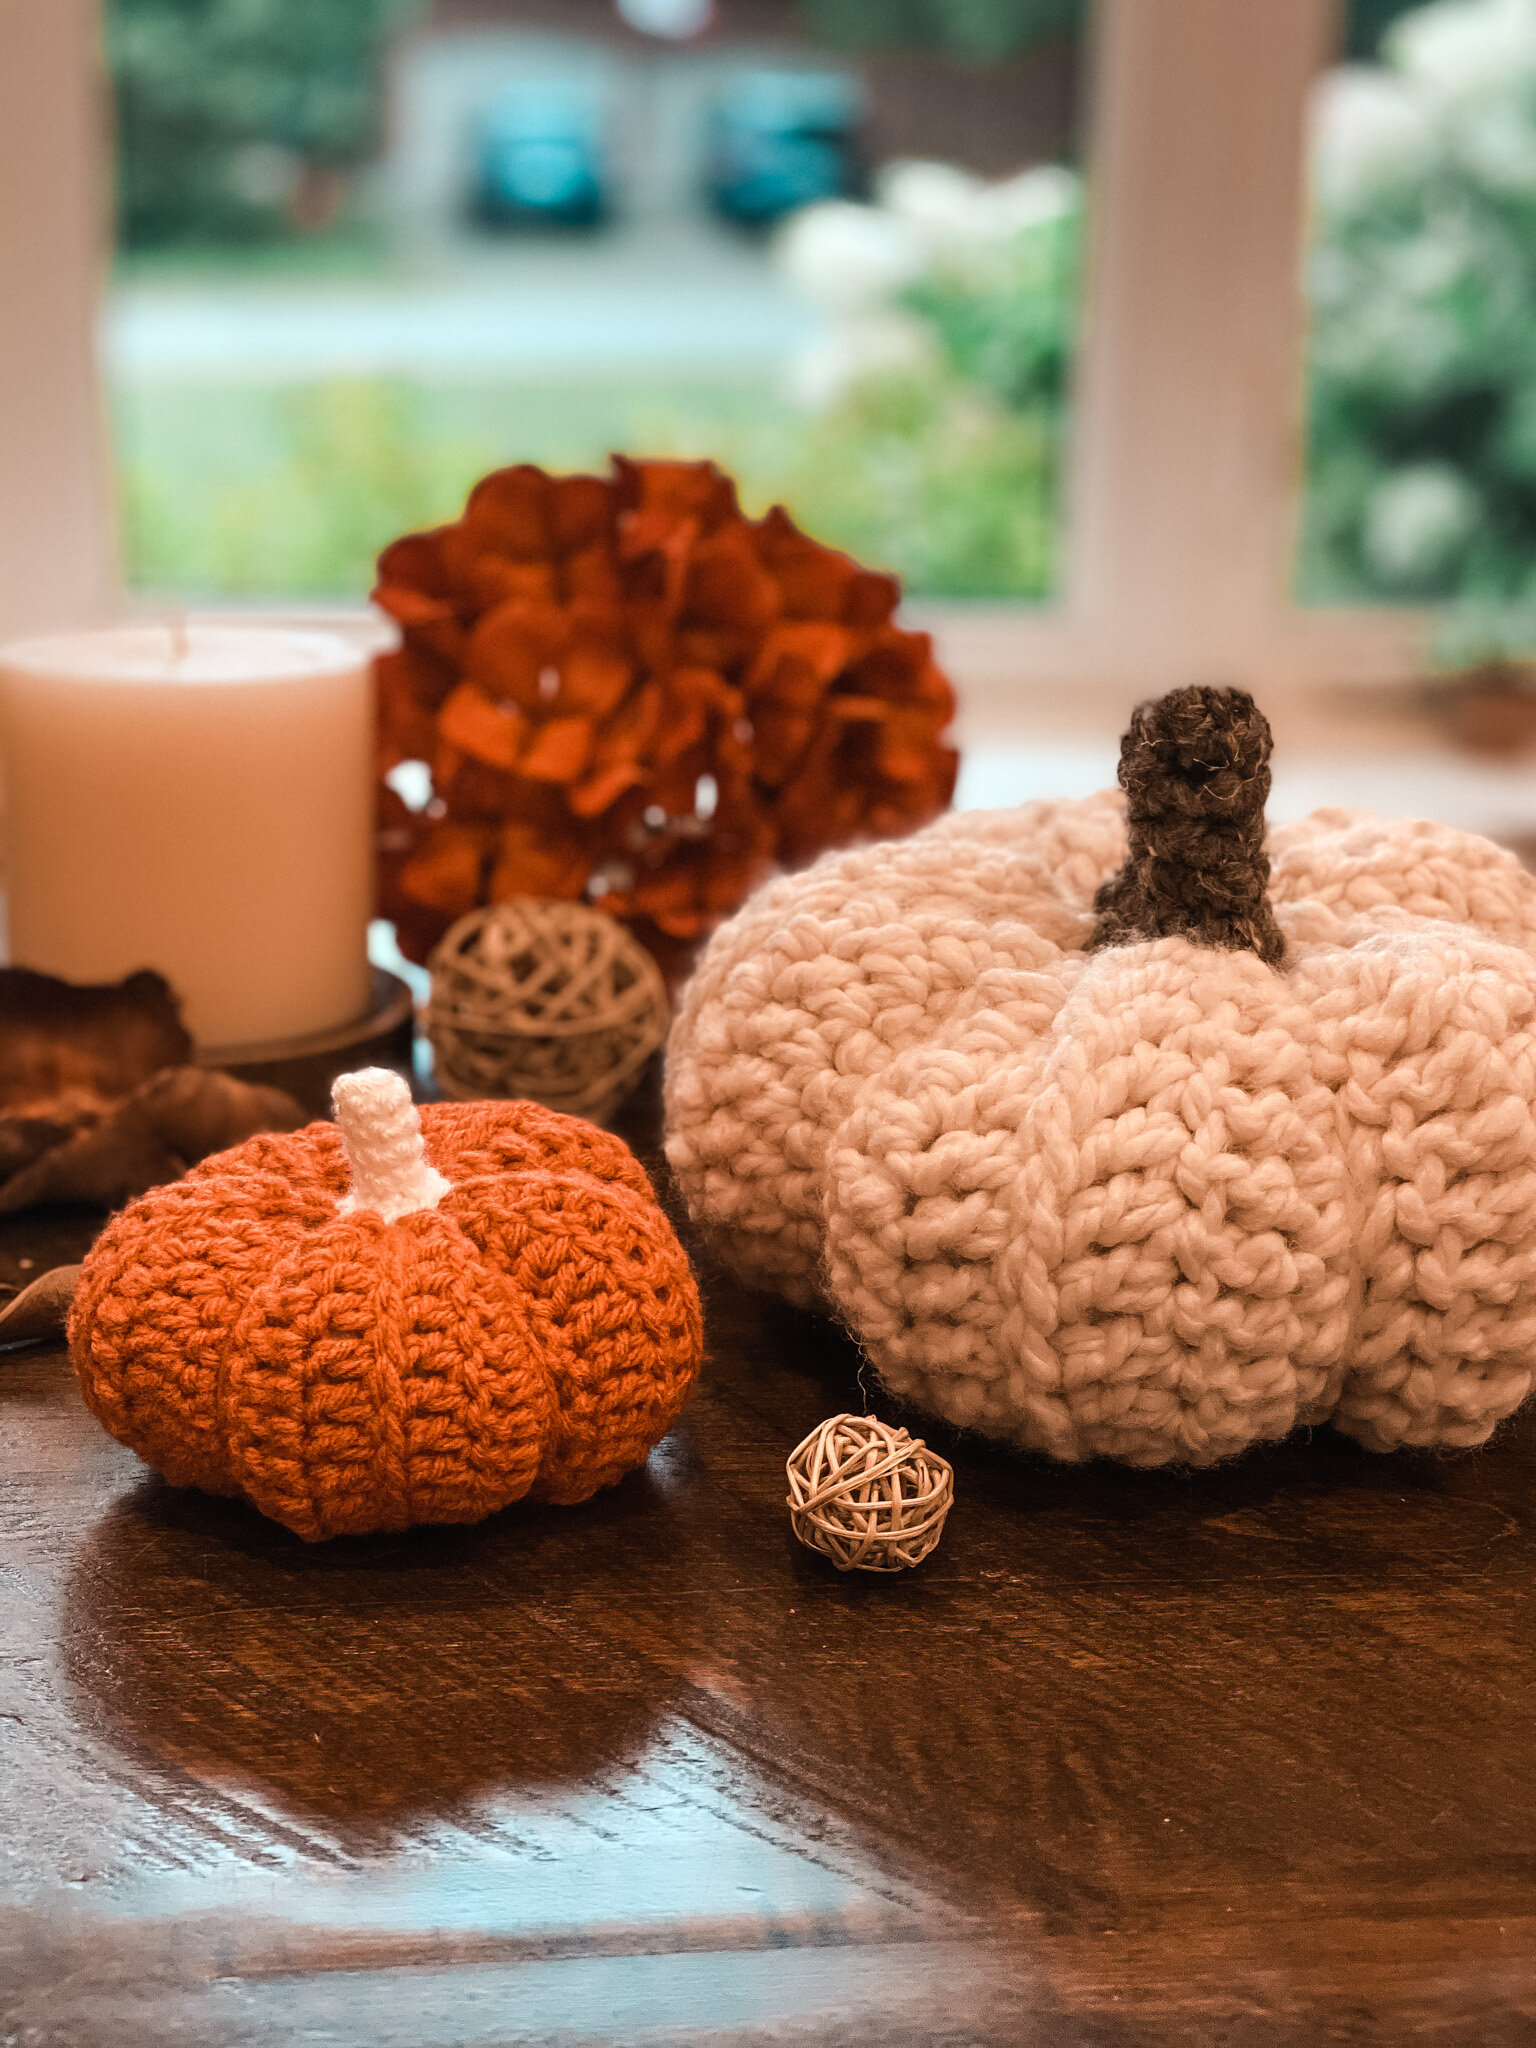
My cream coloured pumpkin is a Super Bulky: Lion Brand Yarn Wool Ease Thick and Quick in Fisherman (main colour) and Barley (stump), used 1 full ball
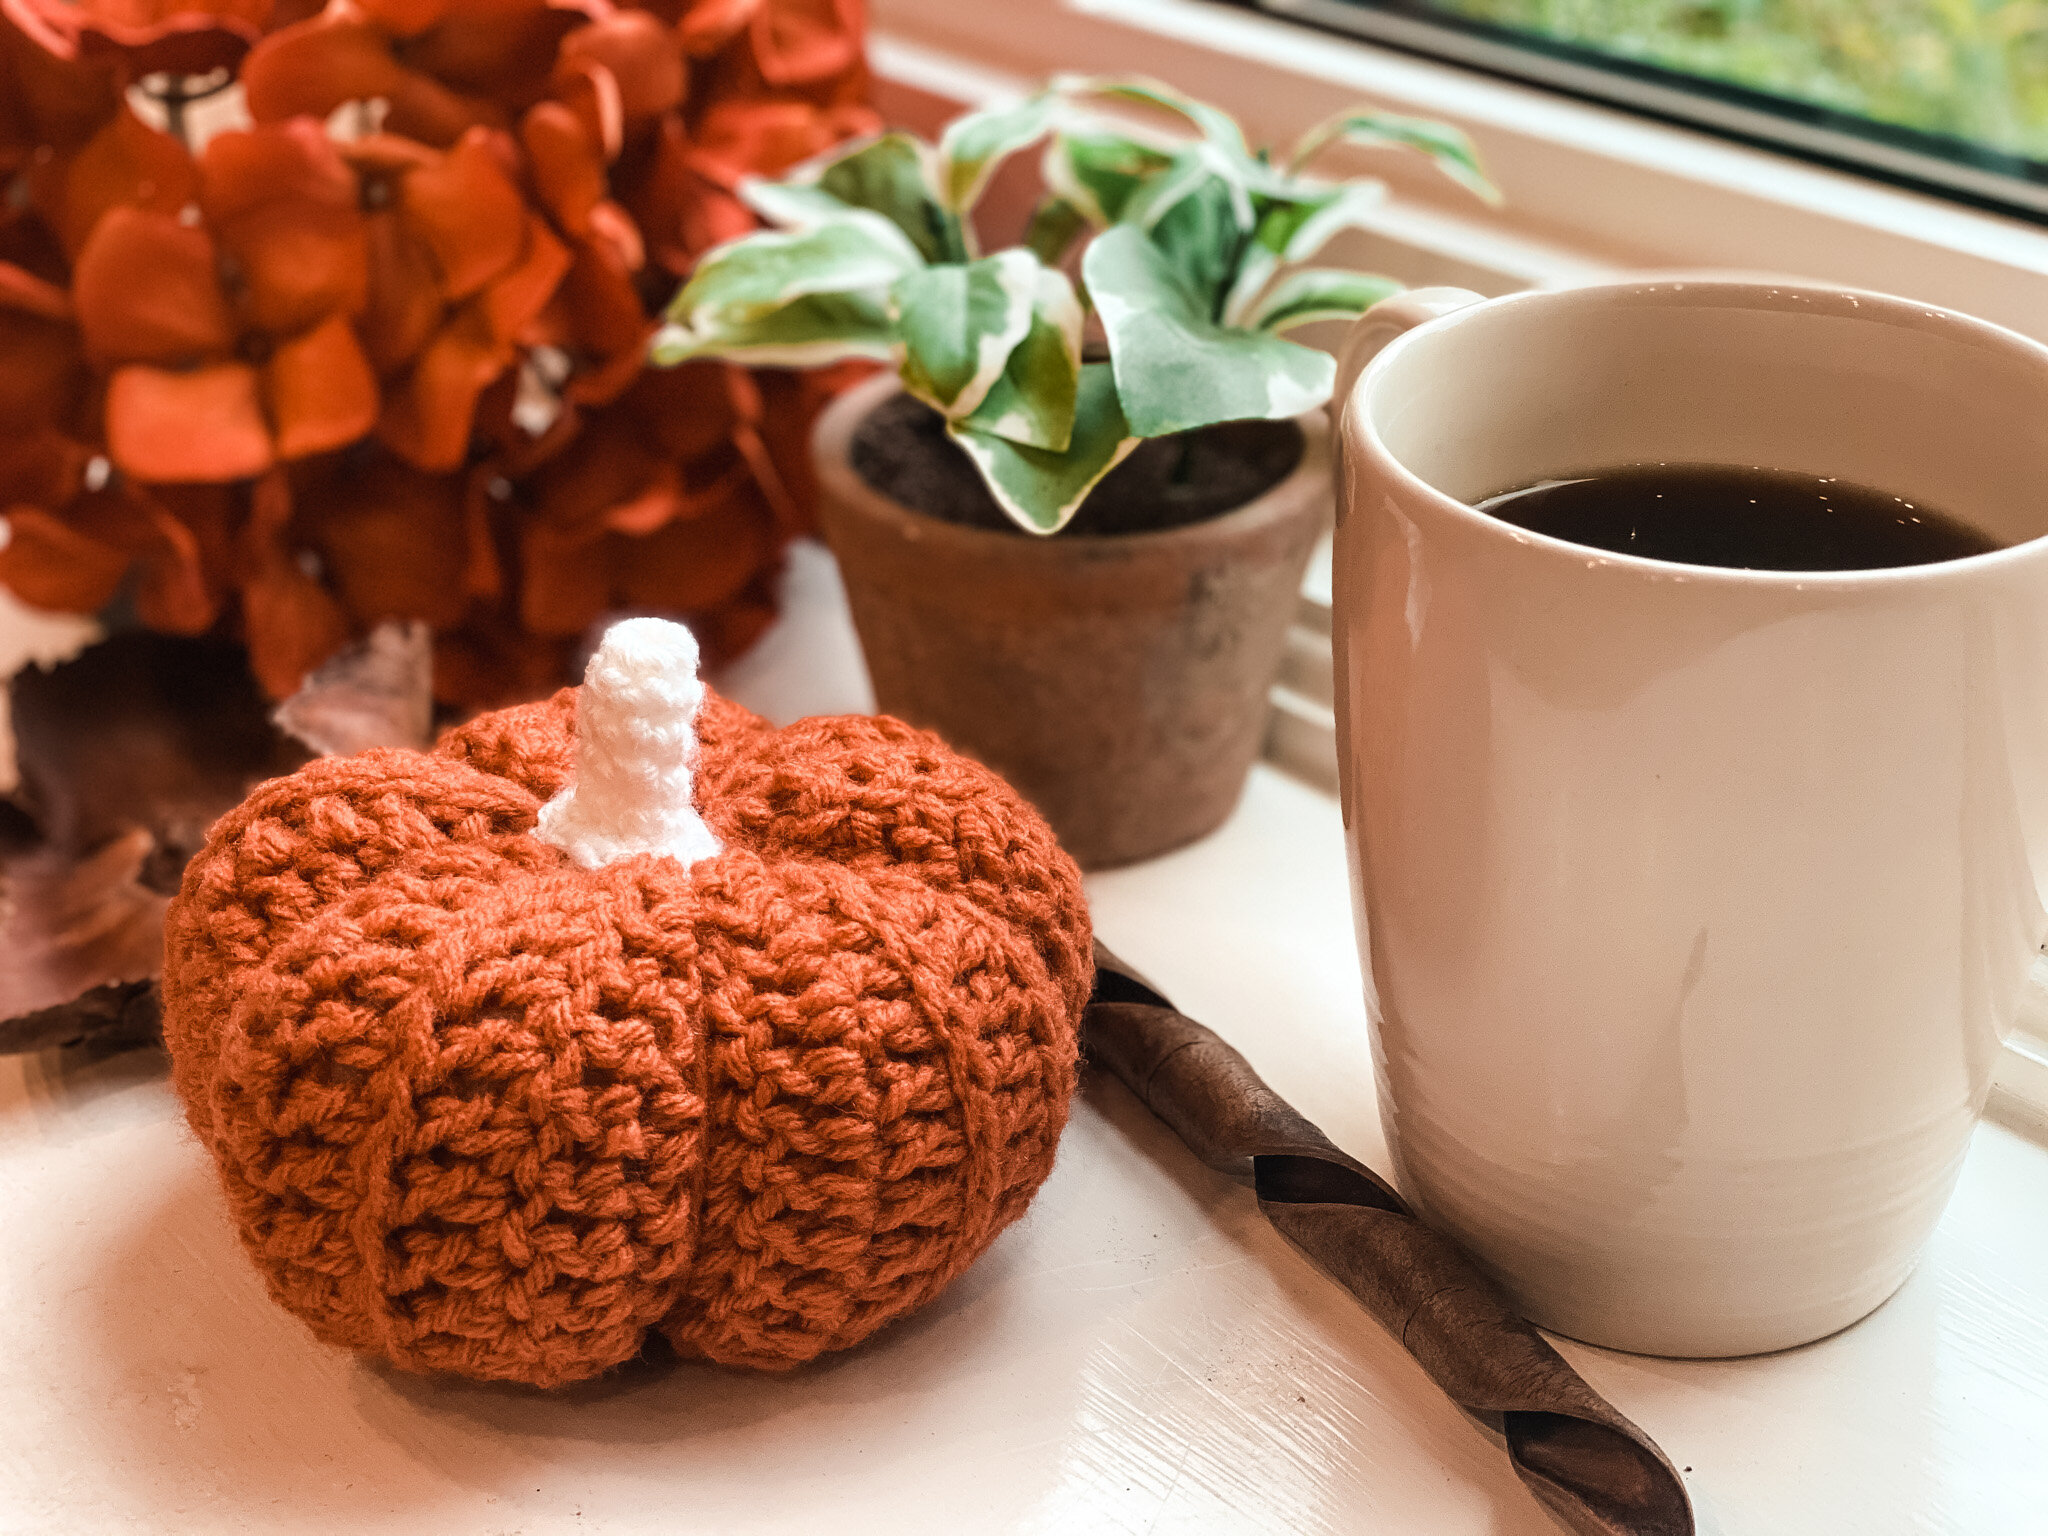
My dark orange pumpkin is a Worsted Weight: Loops & Threads Impeccable Solids in Pumpkin (so obvious!) with an unidentified white scrap yarn as the stump
Crochet hook appropriately sized for your yarn weight
I tend to go down a hook on the worsted weights (used a 4.0mm on the orange, 5.0mm on the grey and 9.0mm on the cream)
I prefer metal hooks (mine are these!) but plastic works just as well!
Scissors
Tapestry needle
Stuffing
I used extra polyfill I had laying around, very similar to this Fiberloft filling
Tip: use new materials only and follow safety guidelines for toys/stuffing in your country/region
Pattern:

Pumpkin Body
The pumpkin body is worked flat in rows using a combination of ch, sl st, sc, sc2tog and dc stitches to provide ridges and texture.
It has 5 identical sections. The flat rows are joined at the end of the pattern to make a cylinder that is then stitched into shape and stuffed.
If you want the pumpkin to be taller or thicker you can simply add more stitches to the width!
Note: on dc rows, the ch2 at the start of the row counts as a dc stitch. In sc rows, the ch1 at the start of the row does NOT count as an sc stitch.
Setup Row: Ch 17, turn (the first 2 ch will count as a dc)
Row 1: Dc in 3rd ch from hook and across, turn [16 stitches including the ch 2]
Row 2: Ch 2 (counts as first dc), sc across, turn [16 st]
Row 3: Ch 1, sl st in each st across, turn [16 st]
Row 4: Ch 2, dc in each st across in the back ‘v’ loops, turn (see tutorial video) [16 st]
Row 5: Ch 2, dc in each st across, turn [16 st]
Row 6: Ch 1, sc2tog across, turn [8 st]
Row 7: Ch 1, 2sc in each st across, turn [16 st]
Row 8: Ch 2 (counts as first dc), dc in each st across, turn [16 st]
Row 9: Ch 2 (counts as first dc), dc across, turn [16 st]
Row 10: Ch 1, sl st in each st across, turn [16 st]
Row 11: Ch 2, dc in each st across in the front ‘v’ loops, turn (see tutorial video) [16 st]
Row 12: Ch 2, dc in each st across, turn [16 st]
Row 13: Ch 1, sc2tog across, turn [8 st]
Rows 14-34: Repeat Rows 7-13 three more times, alternating row 11 between stitching in the back ‘v’ and front ‘v’. See tutorial video for more details. All the slip stitch texture should be on the right side of the pumpkin when laid flat. You will have 5 pumpkin panels in total.
With wrong side facing (side without the sl st texture rows) and right sides together, hold last row with first row. You can then choose to join the panel into a cylinder shape by sewing it together, or by crocheting one more joining row, below. My video tutorial shows the steps for the joining row.
Row 35: working through both thicknesses, sc through first stitches. The next stitch is an sc through the same st in the last row and the next stitch in the first row. Repeat in this fashion across, ending up with 2sc in each of the last row stitches and one sc in each of the first row stitches.
Fasten off, leaving an extremely long tail for finishing.

Pumpkin Finishing
Using the tapestry needle, weave needle through the bottom edge stitches as close to the edge as possible all around. Pull through the middle hole and tighten.
Bring end up the centre to the top and weave needle through, close to the edge again. Before pulling tight, shape and stuff. Then, pull the end very tight.
Pull the string through the middle of the pumpkin and around one wedge and pull as tight as you’d like for ridge definition. Repeat for each of the 5 wedges. Secure tightly and fasten off.
“And all the lives we ever lived and all the lives to be are full of trees and changing leaves...”

Stump
The stump is stitched in the round, starting with a magic loop and then working in a continuous round
Setup Round: 6 sc into a magic loop, do not join
Round 1: sc in each stitch around, do not join
Repeat Round 1 twice more
Round 4: 2sc in first st, sc in next 2 st, 2sc in next st, sc in next 2 st, do not join
Round 5: 2sc in first st, sc in next 3 st, 2sc in next st, sc in next 3 st, sl st into next st
Fasten off with long tail for sewing
Stitch in place and weave in loose end

And VOILA!
Pumpkins galore! Don’t you just love the texture and the squish? The perfect decoration, gift or toy for a little one.
“Autumn is a second spring when every leaf is a flower.”